
I remember the first time I applied to a National Park Service (NPS) job on USAJobs.gov. I was 18, a freshman in college, and spent way too much time stressed, confused, and crying about it to my dad on the phone as he tried to walk me through what I was supposed to be doing. Since that Spring 2014 semester, I’ve applied to an unknown number of federal job announcements, both NPS and not, and helped others navigate the USAJobs platform. So, here is my step-by-step guide to USAJobs.gov for beginners looking to find employment with the National Park Service. Using this guide, you’ll be ready to apply to the seasonal summer positions when they go live every October/November and any permanent job opportunities you find.
Step 1: Go to USAJobs.gov and Create an Account
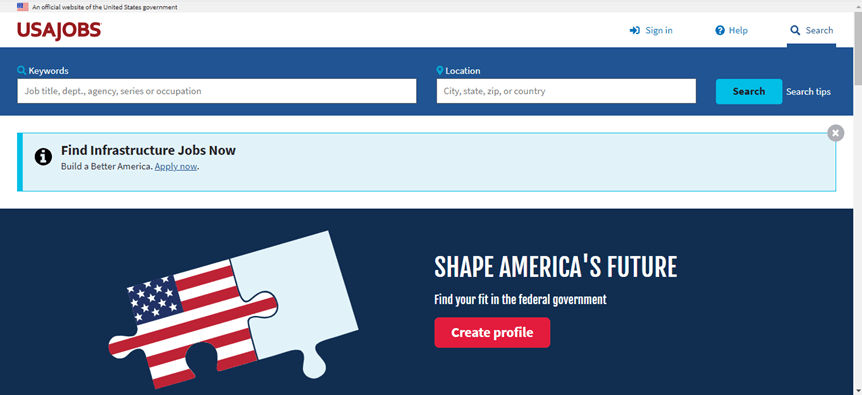
USAJobs.gov is the job platform that nearly every federal department and agency uses. There are a few exceptions, like the FBI, who post to their own websites. USAJobs is where the U.S. Department of the Interior, the department in which the National Park Service is housed, posts their job announcements. Creating your own USAJobs account will allow you to apply for jobs, save job announcements you’re interested in, create personalized search preferences, and upload any documents you’ll need for the applications.
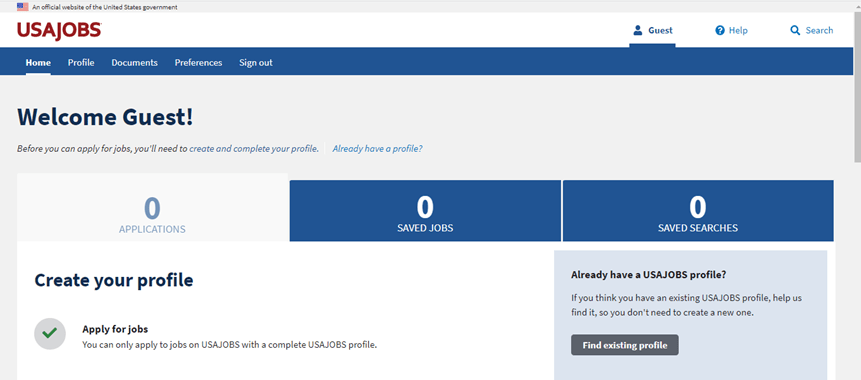
Step 2: Create a USAJobs Resume
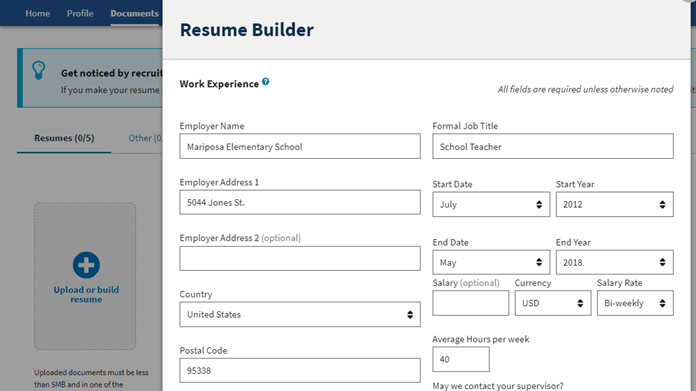
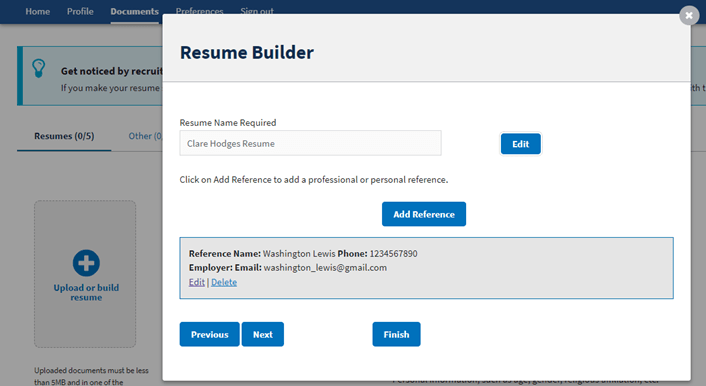
After creating your USAJobs account, you should create your resume. To do this, I highly recommend that you use the in-website resume builder. With federal jobs, your resume needs to be all encompassing. The first hurdle in the application process is getting past the computer that screens everyone’s applications. Using the in-website builder will allow your resume to be more detailed and thus increase your chances of getting past this computer screening. The resume builder will encompass your work history, education, references, and any other skills and certifications you wish to include. Since it is so comprehensive, it will be much longer than the real-world standard of one page. This is totally fine and completely normal. Do not try to make your resume fit onto one page.
Important tip: you will need to fill out the “Weekly hours worked” block. I nearly didn’t make a cert (the list of qualifying applicants that applied to a job) because I used my real-world resume and didn’t include the amount of hours I worked each week.
Step 3: Upload Your Other Documents
As someone who will be applying to their first federal job, your main focus will be your transcripts from high school/college or any professional certifications. For the transcripts, these do not have to official copies. They can be unofficial copies you download from your school. In fact, most jobs that have education qualifications will state something along the lines of “be able to provide official transcripts if requested”, so there’s no need to pay for official transcripts until a job requests them. Personally, in my time working for the federal government, I’ve never had a job actually request my official transcripts. Helpful tidbit, you don’t need a cover letter for federal job applications. It’s one of the things that makes applying to federal jobs more bearable than applying to non-government jobs: I don’t become an anxiety riddled mess over cover letters. You can still write them if you wish, just know that they’re not required.
Step 4: Run a Job Search
The most common way of becoming a NPS ranger is to become a seasonal ranger and work your way to a permanent position from there. For most national parks in the U.S., the summer seasons are the busiest and they’ll post their seasonal job announcement in October/November of every year.
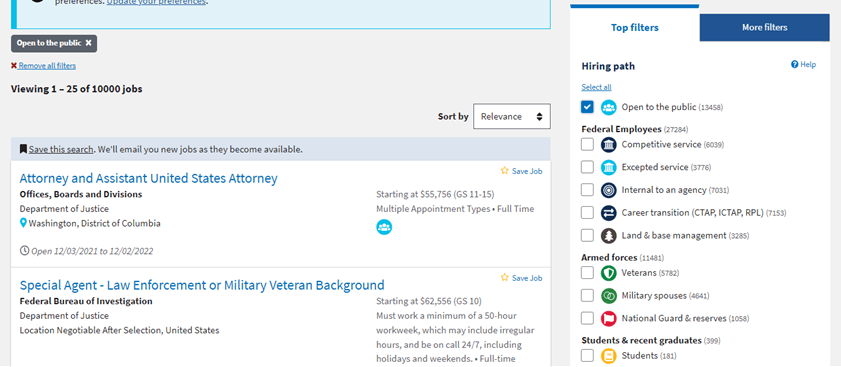
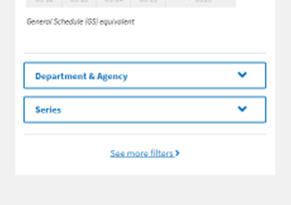
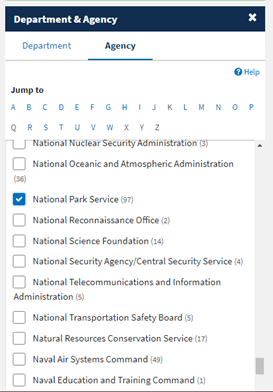
I find it the easiest to start a search with no parameters. This will give you a starting point with all positions listed on USAJobs, and then you filter from there. As someone who has never been a federal employee before, you’ll filter for “Open to the Public” positions. It is the light-blue icon with three people in it. Once you’ve filtered for this, scroll down to the bottom of the filter list to the “Department & Agency” option. There, you’ll click on “Agency” and then click “N” to jump to the agencies beginning with the letter “N”. Once you’ve selected “National Park Service” the announcement results will be filtered even for NPS jobs that are open to the public.

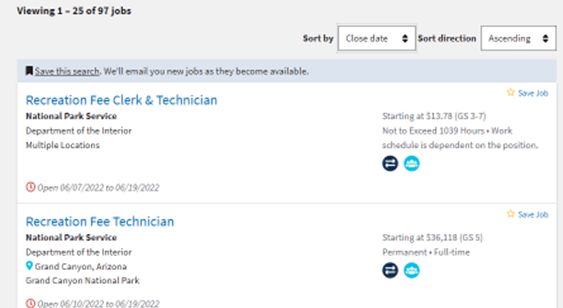
Once these two filters are engaged, scroll to the top of the announcements and make sure to organize the results by closing date. Each job has a window in which you can apply and you don’t want to accidentally miss a job you want because it was on page four of the results and the window closed before you applied for it. Sorting by close date will position the jobs closing the soonest at the top of your results.
Step 5: Look through the Job Announcements and Apply
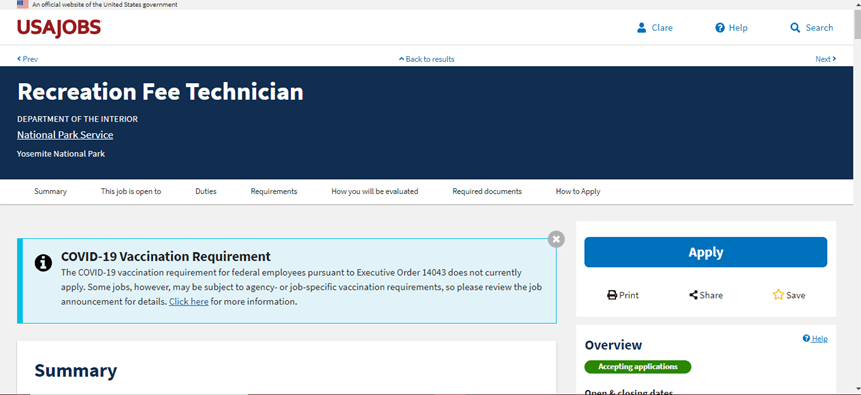
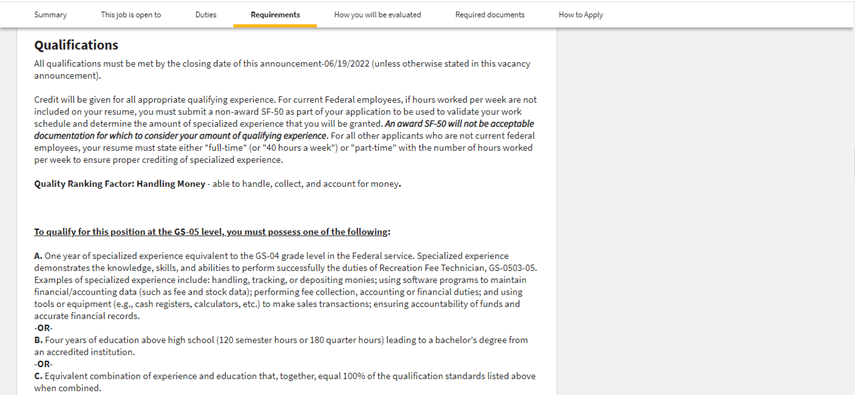
To keep this simple and applicable to everyone, we’re not going to go into GS levels. It can get a bit complicated and they’ll have their own blog post. For now, you’ll need to read the Qualifications for the position to know if you’ll be able to apply for it. Scrolling through all of these job announcements can be daunting, but don’t let that discourage you. My preferred method is to “Open link in new tab” on any position I find interesting and do that page by page for the results. This breaks up the seemingly endless pages of job announcements into manageable chunks. And then you can go through the qualifications of the announcement to see what you can apply for. If you qualify and want to apply, you can save the job announcement to your profile by clicking on the star. Or, if you’ve found a job you want to apply to right away, you can go ahead and click “apply.”
Step 6: Apply for a Job Part 1 – USAJobs
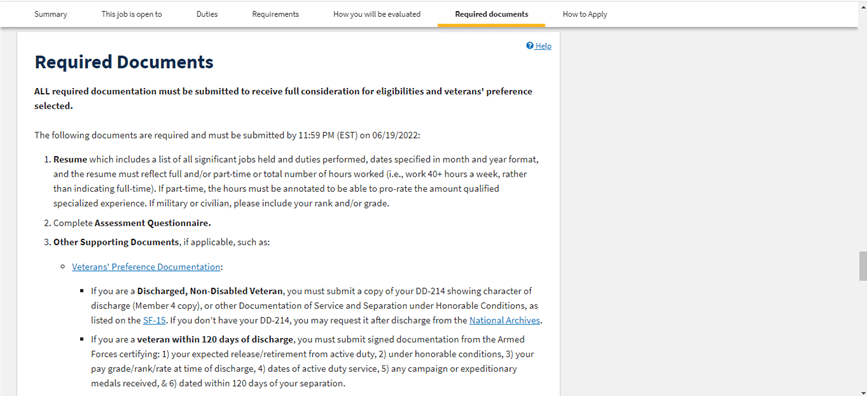
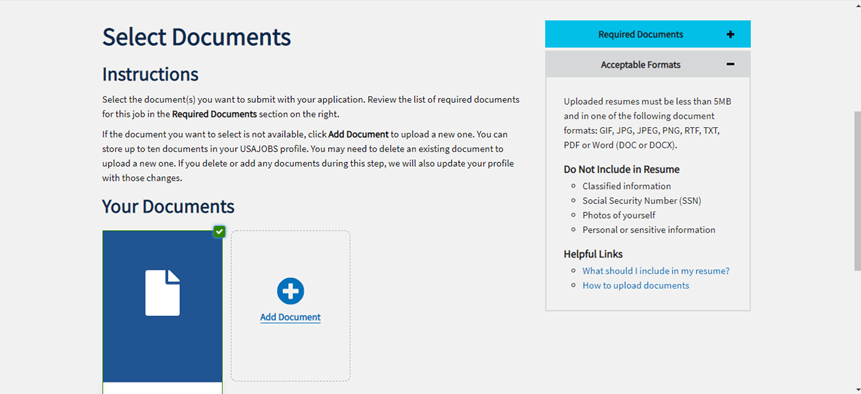
Applying for a job through USAJobs is a two-part process. Part 1 occurs on USAJobs.gov, while Part 2 occurs on the agency’s application website. Part 1 is when you’ll upload your resume and any other supporting document materials you need. Each job announcement has a “Required Documents” section that will list out what you need. Always double check to make sure your account has the proper documents uploaded so that you can use them in your application. Once all of your documents are uploaded and you confirm them, USAJobs will take you directly to the agency’s site.
Important tip: when you’re choosing which documents to upload for the application, there will be a box along the right side of the computer screen making sure you’re remember the most important documents. One of these listed is “completed agency questionnaire”. Do not panic! The questionnaire is in Part 2 of the application process. You do not need to upload it to USAJobs. I definitely called my dad in a panic a few times because I couldn’t find the questionnaire on USAJobs.

Step 7: Applying for a Job Part 2 – Agency Questionnaire
*Unfortunately, this section doesn’t have any helpful pictures. I can’t apply for a job with my example account.*
Every job application will have an agency questionnaire you’ll need to complete. The questionnaire is three parts: confirming your personal information, the qualification assessment, and the document upload. The qualification assessment is comprised of multiple questions to determine how much you know about doing the different aspects of the job you’re applying for. Sometimes this will be rating yourself and your experience from “I’ve never had any training” to “I am an expert at doing this.” Other times there will be essay-like questions where you write examples of your experience from previous jobs. The essay-like questions are where it can get time consuming and repetitive, so make sure you have time to dedicate to the application process. After the qualification assessment is where you’ll upload those documents brought over from USAJobs.
Helpful tip: each section can have multiple documents. So, using myself as an example, I can attach all of my transcripts: community college, undergrad, and my in-progress graduate studies all to the Transcripts document section.
Once this section is complete, you’ll confirm that you’ve completed all three sections and USAJobs will let you know that your application has been submitted. Before I go back to the USAJobs site, I like to download my application. This way I will have my questionnaire answers on hand to look over before I go into any interviews I’m offered.
Step 8: Keep Track of Your Application Status
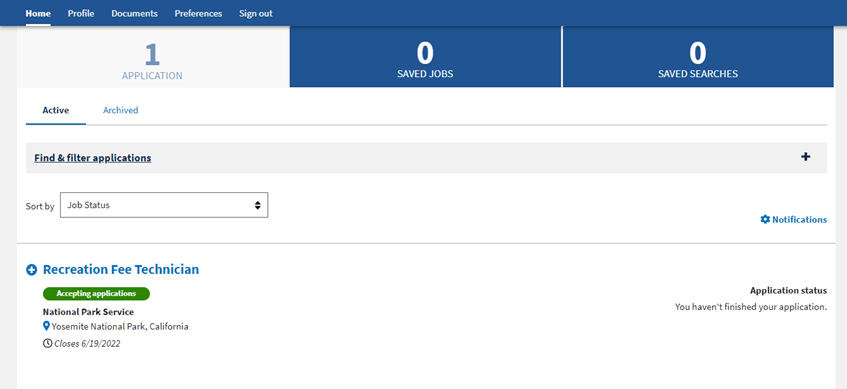
One of my favorite parts of applying to jobs within the federal government is the fact that you get rejection emails in addition to being able to track your application status. There is no sending an application off into the void and just never hearing back. When you log into your USAJobs account, your profile’s main page will be where you an track your job applications. If you want more information, along the right side of each announcement line is a “Track job progress” button. You can click on this to get more information than the main profile page provides.
In my experience so far, for everyone applying to GS9 and above positions, this is your ending point. Congratulations, you are ready to tackle applying for jobs through USAJobs.gov.
Step 9: OPM’s Assessments
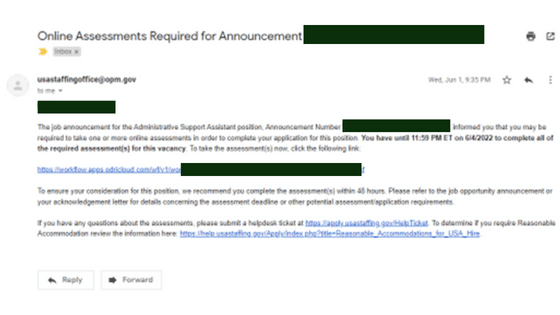
I didn’t want anyone to be blindsided by these, so I’ve included information about them in my guide. Unfortunately, it is my experience so far, that anyone applying for a NPS position that is from GS1 — GS8 will need to take these OPM assessments. These assessments will determine whether you are a qualifying candidate for a position. However, we aren’t told what our scores are, what those scores mean in relation to how well we did on the tests, and what we need to score in order to be considered for jobs. We also can’t retake them if we did poorly on them. The OPM Assessments are barriers to employment for many people wanting to work for the federal government. These tests are a mix of the LSATs and the NCLEX. The LSATs are the law school admittance tests and the NCLEX is the licensing exam nurses before they can begin their jobs as nurses. Now, you might be asking; “What do these tests have to do with giving historical tours of battlefields or explaining the importance of rock layers in a cave system to the geologic timeline?” Well, they don’t. Like I said, these assessments are just barriers of employment to create more obstacles for people applying to jobs. I wish there were tips and tricks I could give you, but I don’t have any.
You’ll need about three hours to complete the assessments. You’ll have five minutes per questions to read the question and answer it. My best tip is to make sure you have a good internet connection and have a pencil and scrap/scratch paper to work through the logic puzzles on.
You’re Ready to Apply!
I hope these steps will help you more easily navigate USAJobs.gov in order to apply for jobs and become a NPS ranger. I can’t wait to see everyone wearing the green and grey and donning their own Smokey the Bear hats!
Happy job hunting and good luck on your applications!
